Introduction
Online shoppers can’t physically touch or examine your product before buying, which means your photos are doing all the persuasive work a physical store display normally would. Poor images are one of the fastest ways to lose a sale, even for a genuinely great product. These ecommerce product photography tips cover exactly how to create images that build trust and drive conversions, even without an expensive professional setup.
Why Product Photography Directly Impacts Sales
Quick answer: Product photography directly impacts ecommerce sales because customers rely almost entirely on images to judge quality, size, and trustworthiness before purchasing, meaning unclear or unprofessional photos create hesitation that often results in an abandoned cart rather than a sale.
Tip 1: Invest in Proper Lighting First
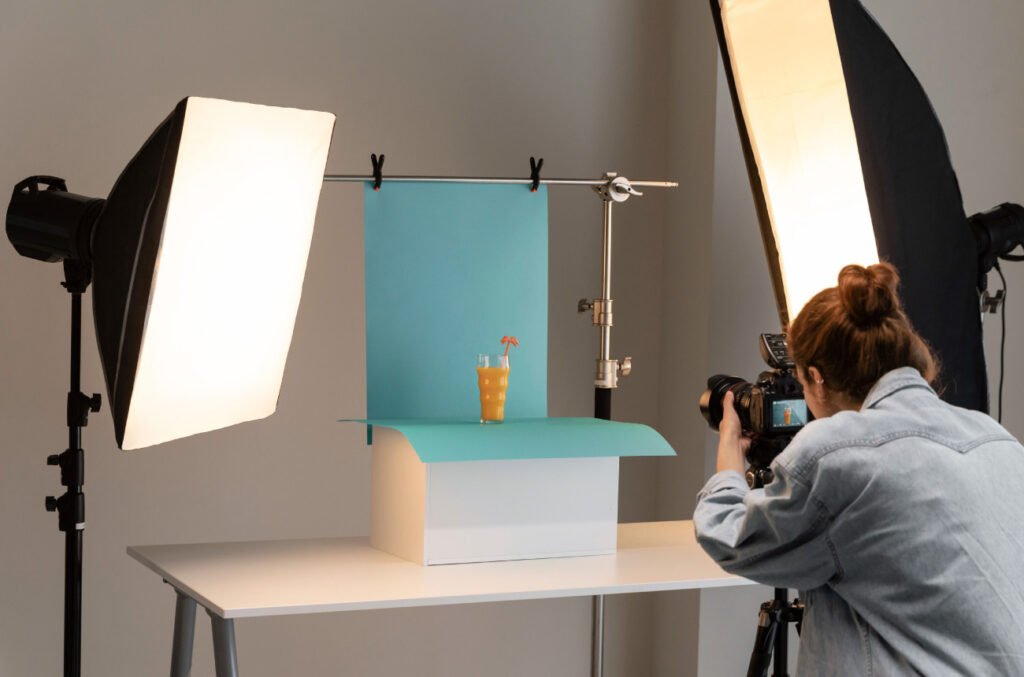
Lighting matters more than camera quality for product photography. Natural window light (diffused through a sheer curtain) or an affordable ring light setup dramatically improves image quality compared to harsh overhead lighting or dim indoor bulbs.
Tip 2: Use a Clean, Consistent Background
- White or neutral backgrounds remain the standard for main product listing images, particularly on marketplaces like Amazon
- Consistent backgrounds across your entire catalog create a more professional, cohesive brand impression
- Lifestyle backgrounds work well for secondary images showing the product in real use
Tip 3: Show Multiple Angles
Quick answer: Including multiple angles — front, back, side, and close-up detail shots — in your product listing significantly reduces customer uncertainty and returns, since it compensates for the inability to physically handle the product before buying.
At minimum, aim for 4-6 images per product covering different angles and use cases.
Tip 4: Include Scale and Size Context
A common complaint in negative reviews is products being smaller or larger than expected. Include an image showing the product next to a common reference object, or with clear dimension labels, to set accurate size expectations upfront.
Tip 5: Capture Lifestyle and In-Use Shots
Beyond clean studio shots, images showing the product being used in a realistic context help customers visualize owning it themselves, which builds stronger emotional connection than purely clinical product-only images.
Tip 6: Edit Consistently, But Don’t Over-Edit
Basic editing — adjusting brightness, cropping, ensuring true color accuracy — improves professionalism significantly. However, over-editing that misrepresents actual color or texture leads directly to disappointed customers and increased returns.
[link to related guide on how to start dropshipping business here]
Tip 7: Optimize Image File Size for Fast Loading
Large, unoptimized image files slow down your store’s loading speed, which directly hurts both conversion rates and SEO rankings. Compress images appropriately while maintaining visual quality — tools like TinyPNG handle this easily.
Tip 8: Add Descriptive Alt Text to Every Image
Beyond accessibility benefits, descriptive alt text helps your product images appear in Google Image search results, creating an additional, often overlooked traffic source for ecommerce stores.
Budget-Friendly Photography Setup for Beginners
You don’t need a professional studio to start. A smartphone with a good camera, a simple white poster board as backdrop, natural window lighting, and a basic tripod cover most beginner needs for under ₹3,000 total investment.
FAQs
Q1: Do I need a professional photographer for ecommerce product photos? Not necessarily when starting out — a smartphone with good lighting and careful composition can produce genuinely sellable images, though professional photography becomes worthwhile as your business scales.
Q2: How many images should each product listing include? 4-6 images covering multiple angles, along with at least one lifestyle or in-use shot, is a solid baseline for most product categories.
Q3: What’s the ideal background for main product photos? White or neutral backgrounds are standard and often required for marketplace listings like Amazon, while lifestyle backgrounds work well for supporting images.
Q4: How much does professional product photography typically cost? Rates vary widely, but many photographers charge per product or per shoot session, making it worth budgeting for once you have consistent revenue to invest back into your store.
Q5: Does product photography actually affect SEO? Yes — optimized image file sizes improve page load speed (a ranking factor), and descriptive alt text can help images appear in relevant Google Image searches.
Q6: What’s the biggest photography mistake new ecommerce sellers make? Using inconsistent lighting and backgrounds across their catalog, which creates an unprofessional, disjointed impression even when individual photos look decent.
Conclusion
Strong ecommerce product photography tips ultimately come down to clarity, consistency, and genuinely representing your product accurately. You don’t need expensive equipment to start — good lighting, a clean background, and multiple angles cover most of what drives customer confidence and conversions. Invest the extra time in your photos before launching a listing; it’s consistently one of the highest-leverage improvements you can make to your store’s sales.
Suggested Alt Text: “Ecommerce seller photographing a product with proper lighting and a clean background”